
Homemade Maple Marshmallows with Marshmallow Root
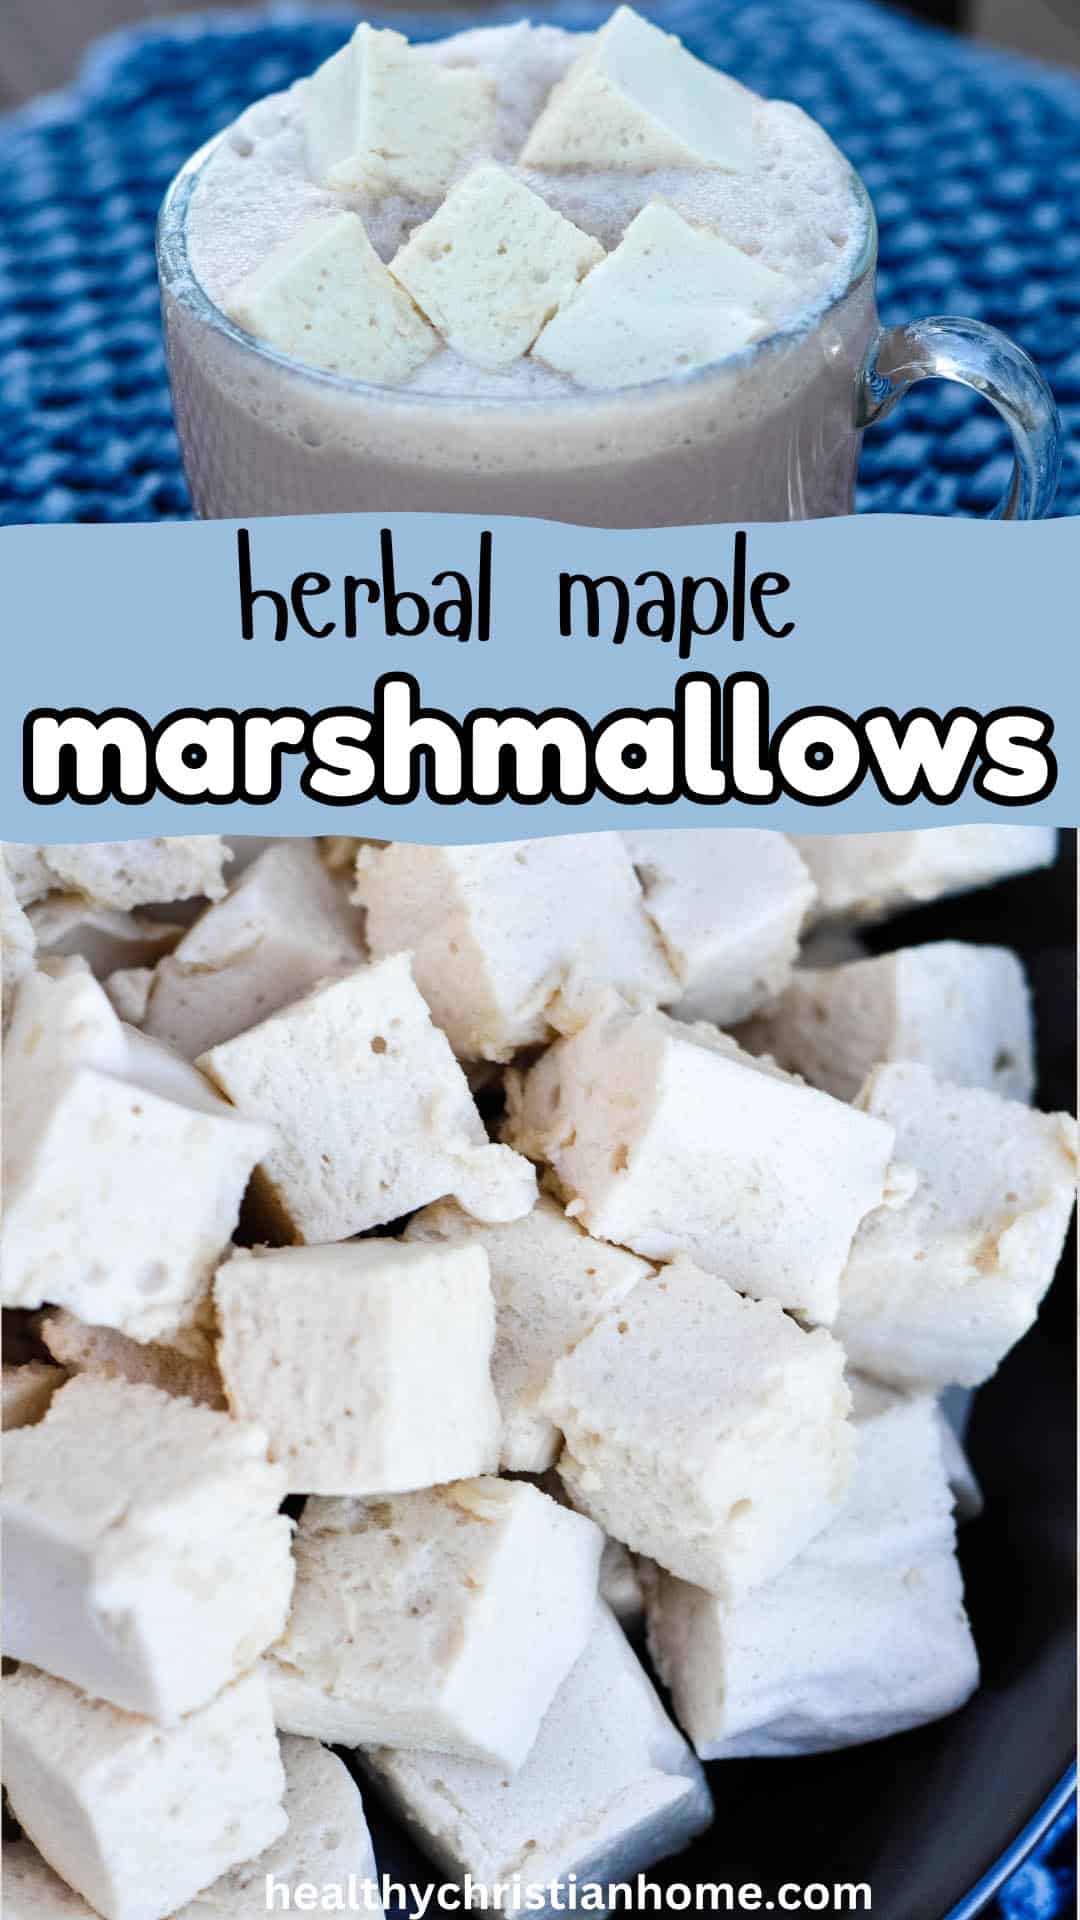
These homemade maple marshmallows with marshmallow root are quick and easy to whip up, perfect for hot cocoa! They feature real marshmallow root tea as the base, which has a unique flavor and makes them extra good for you!

What’s so great about homemade marshmallows with marshmallow root?
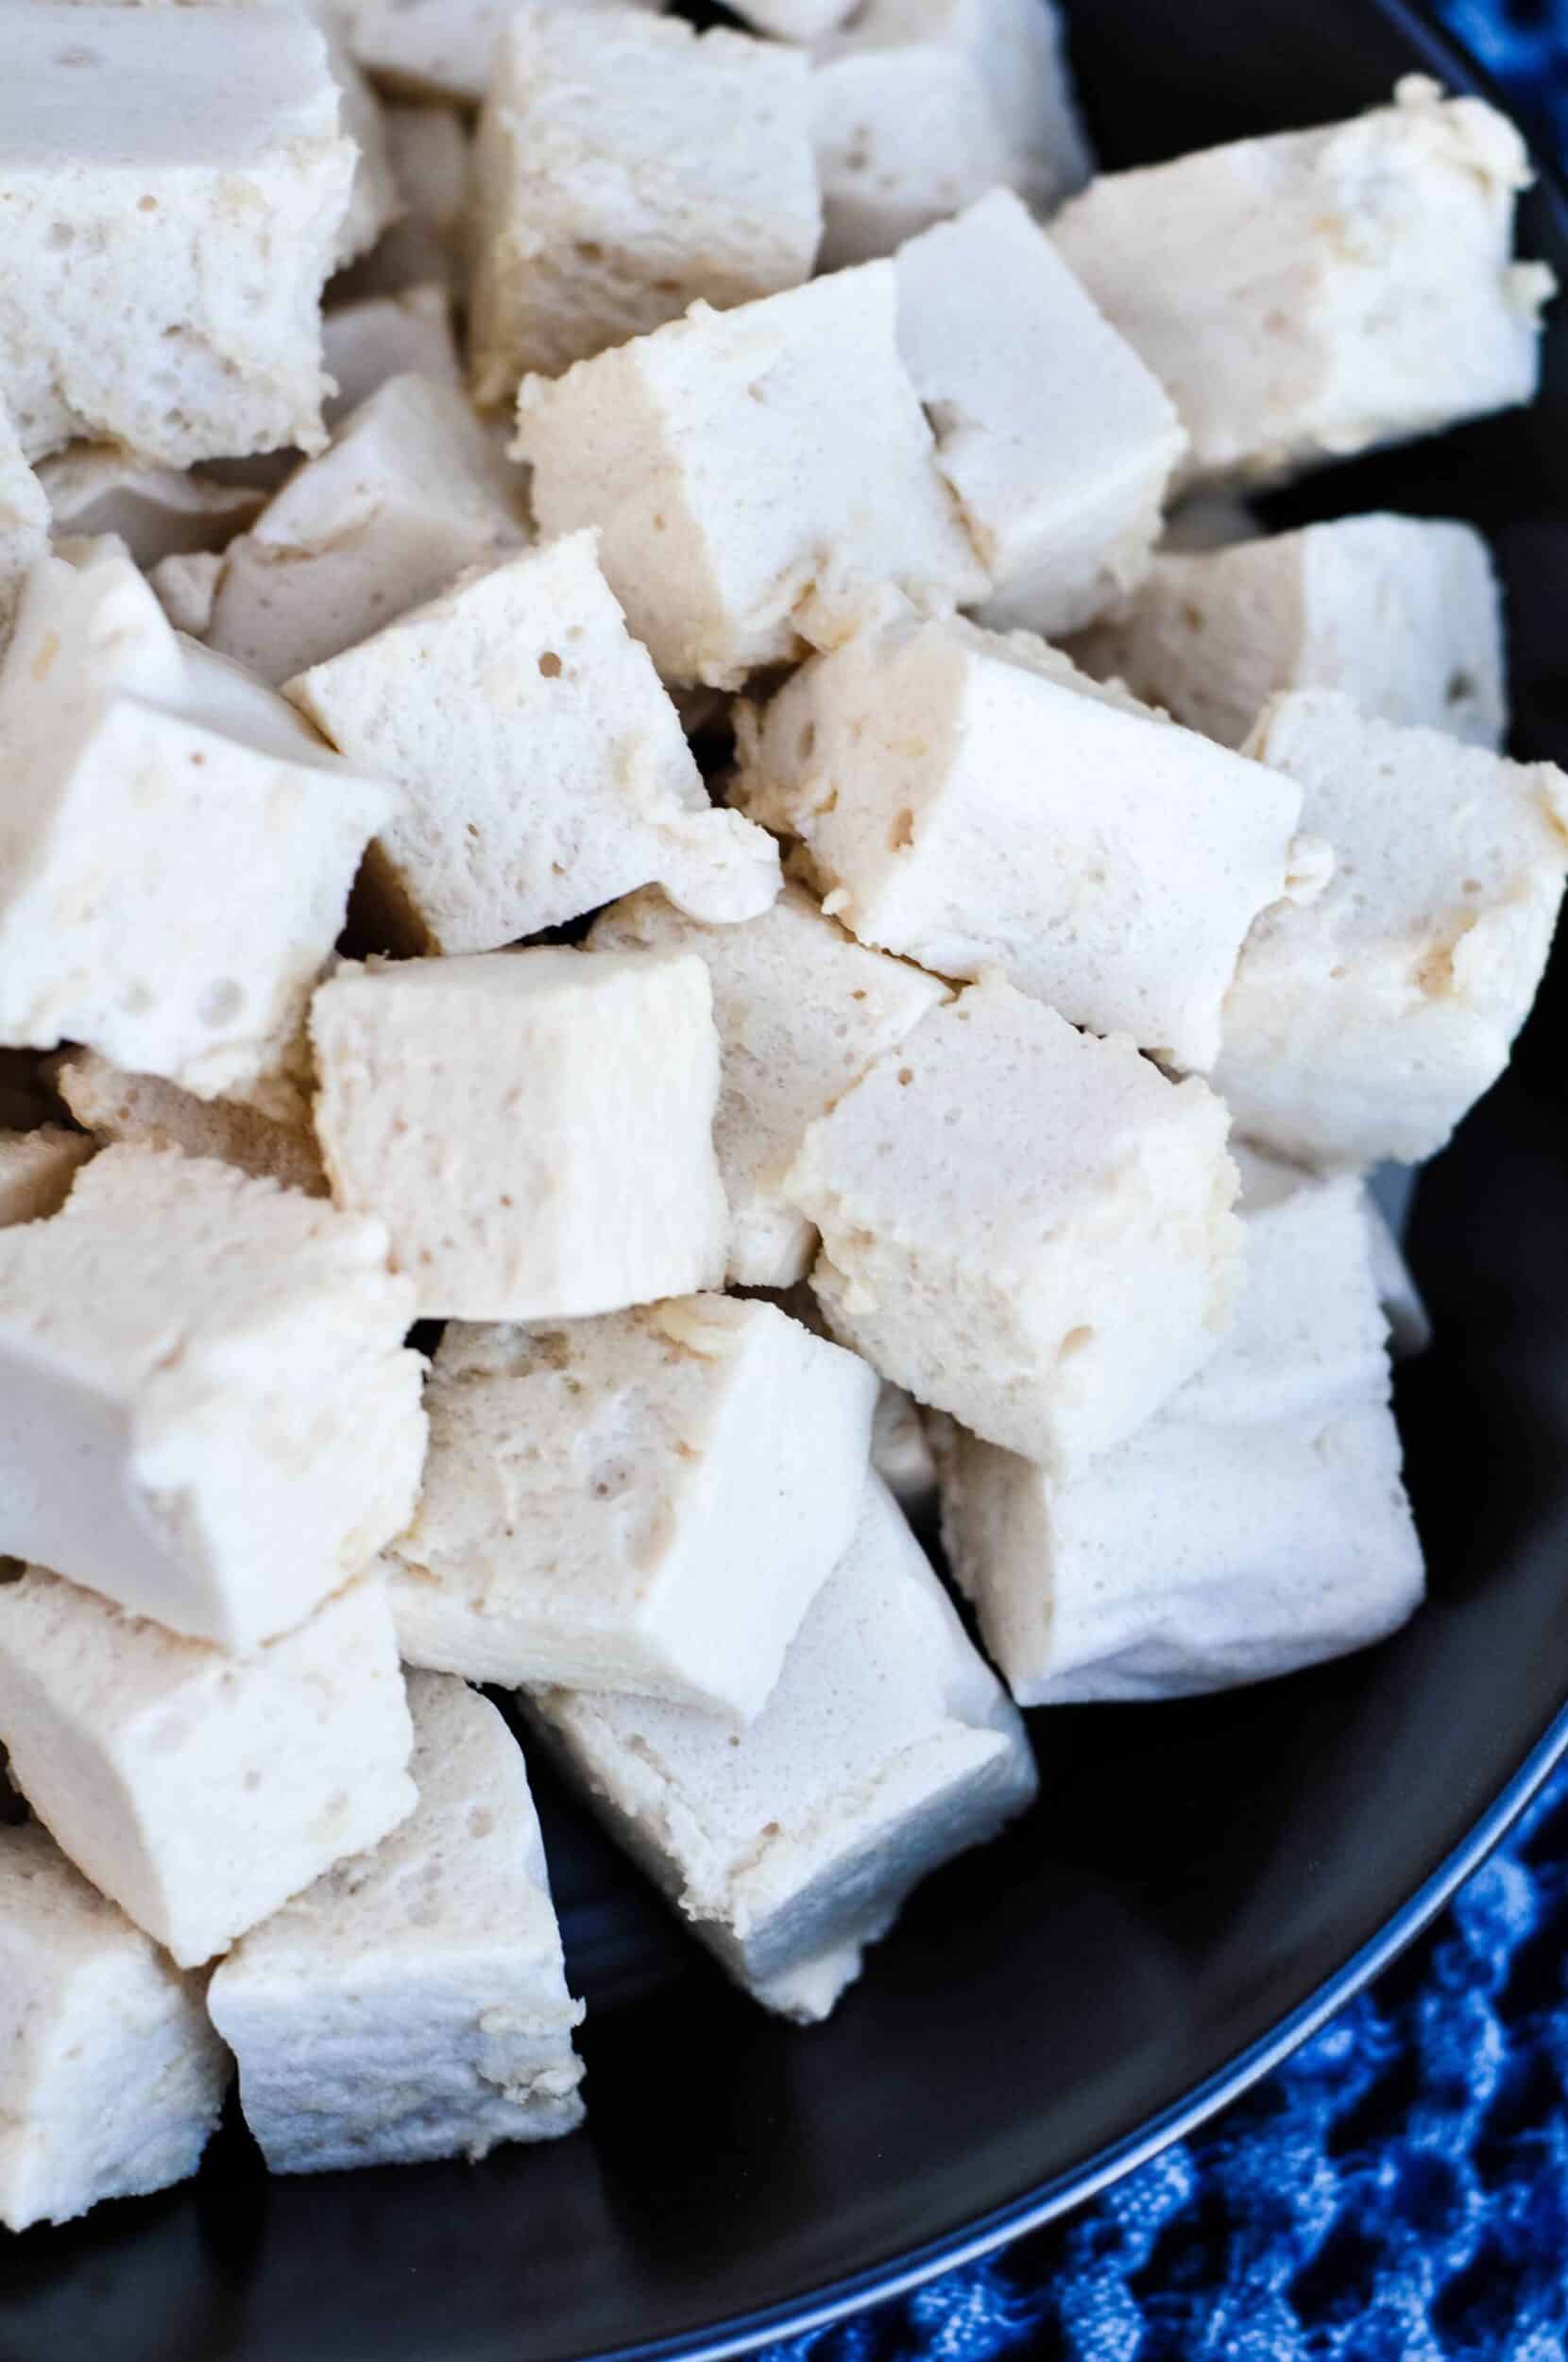
If you haven’t had homemade marshmallows yet, you’re in for a treat! The flavor is out of this world, they are light and springy, and melt beautifully in hot cocoa. They are SO much better than store bought, which contain food coloring, corn syrup, and tetrasodium pyrophosphate. Yuck.
In contrast, these marshmallows are actually health-promoting with gut friendly marshmallow root herb, maple syrup, and soothing gelatin! These are actually one of the most soothing recipes you can make for your gut.

Marshmallow Root Benefits
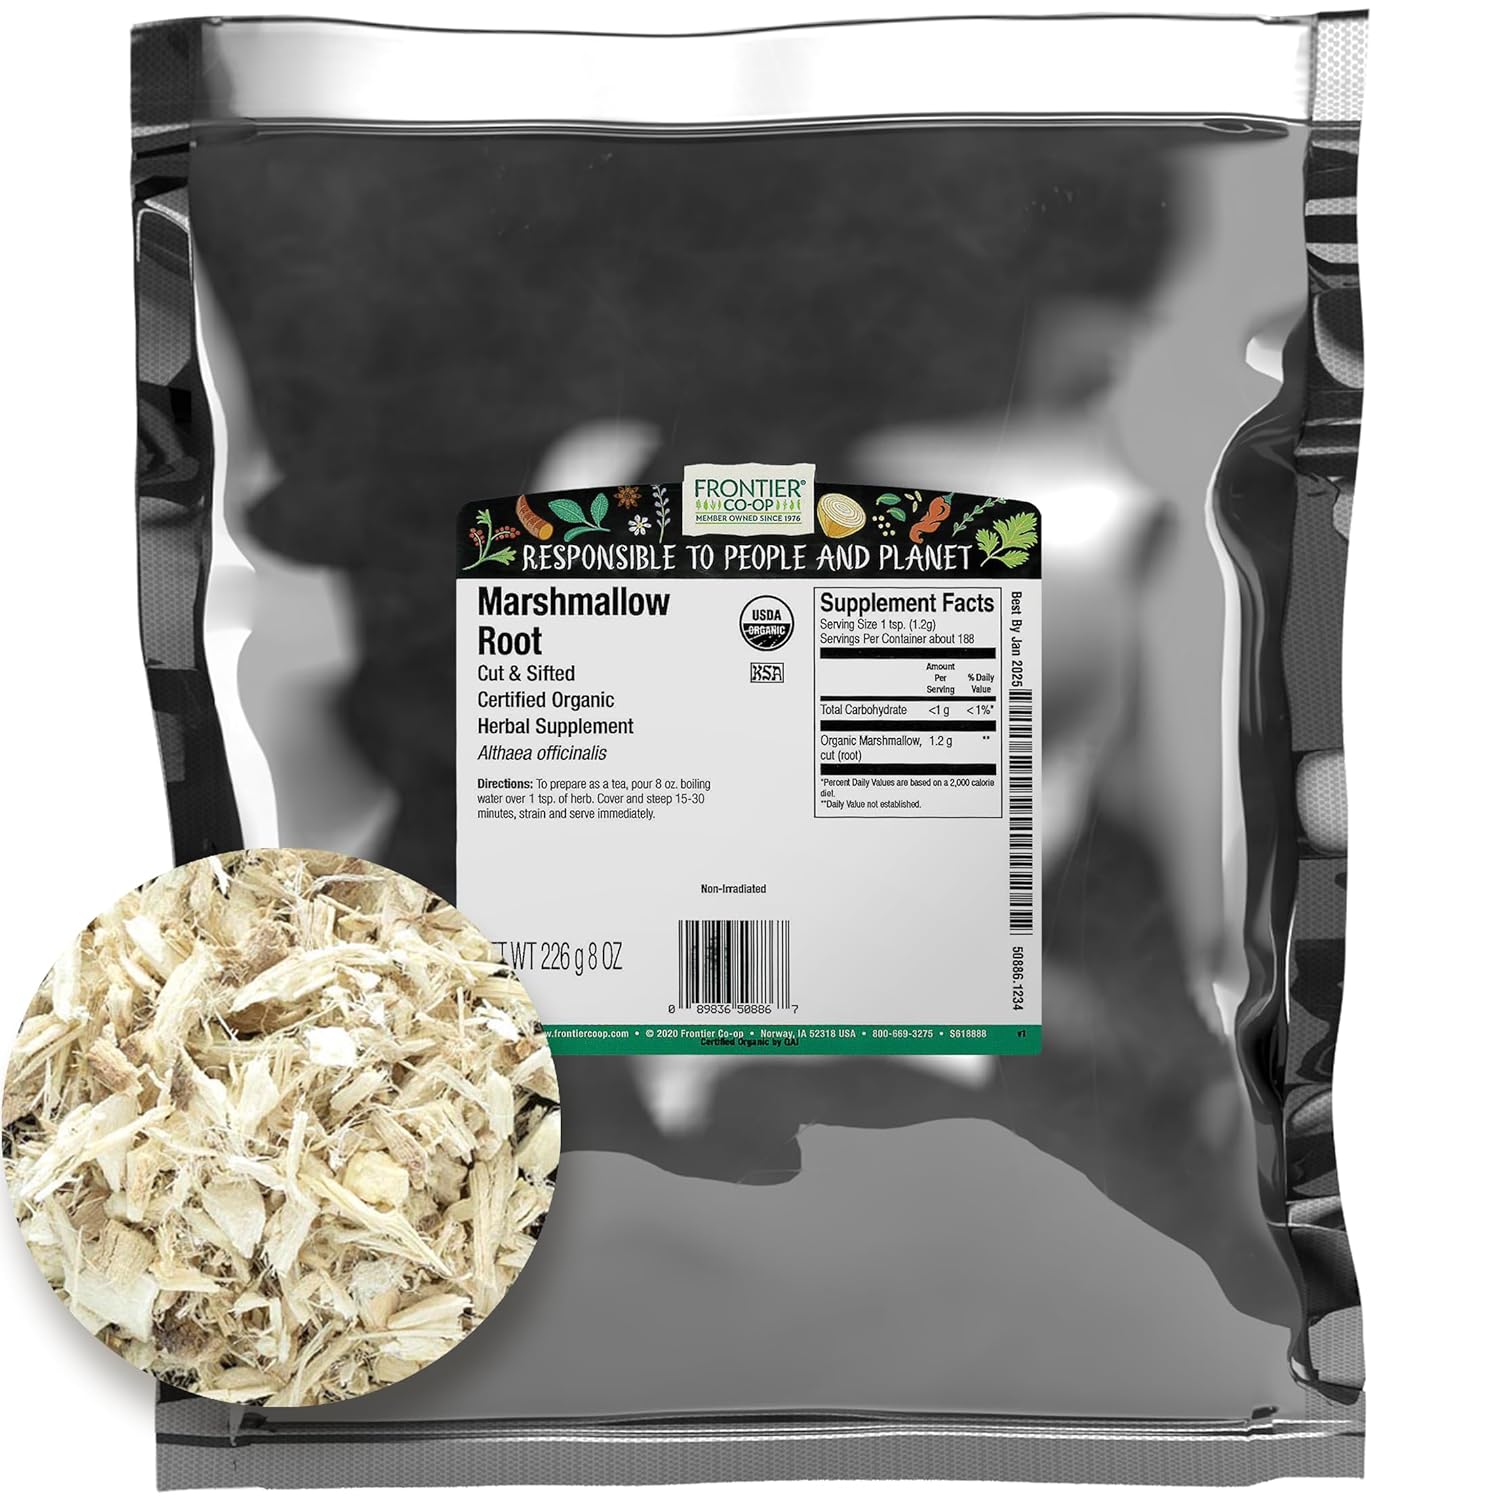
Marshmallows are really genuine and leveled-up when you actually use a marshmallow root tea or infusion as the base! Just add a few tablespoons of marshmallow root to a cup of hot water and brew. Allow the tea to cool before straining and using in this recipe.
Marshmallow root (Althaea officinalis), when brewed, has a unique mucilage that soothes mucous membranes like an irritated throat or the digestive tract. It also may help relieve digestive concerns, act as an antioxidant, and may even improve heart health (1).
This is the marshmallow root I use to make the tea base for this recipe.
Gelatin Benefits
Gelatin is another special ingredient in these marshmallows that make them especially gut-friendly. It is extracted from bone broth and contains almost no flavor, but when dissolved in warm water it gels and creates a firm jelly-like substance.
Gelatin contains protein and lots of amino acids like glycine which has been shown to benefit joints, bones, hair, skin, and nails. It also may improve sleep and gut health (2).
Definitely buy grass fed gelatin from a source you trust — good sourcing also means you can’t taste the gelatin and it performs better. I love the purity of this gelatin brand (use code HEALTHY10)!
How to Make Homemade Marshmallows with Marshmallow Root
Before you proceed with the recipe, make sure to check out my healthy hot cocoa mix! It’s perfect for whipping up hot chocolate whenever you want in just a couple of minutes.
First, make the marshmallow root tea. This step is optional, but it adds additional flavor and herbal benefits. Alternatively, you can just use cool water.
Let the tea cool before blooming the gelatin (a.k.a. letting the gelatin fully absorb liquid). This will ensure that the gelatin dissolves easily into the marshmallow mixture and you won’t end up with any weird gelatin blobs in the final product.

In a stand mixer fitted with the whisk attachment (I LOVE my Bosch mixer as it can handle anything from light fluffy marshmallows to multiple loaves of dense bread!), mix the gelatin, marshmallow root tea, and vanilla. Just combine these ingredients for a few seconds and then turn the mixer off and allow the mixture to bloom (absorb the gelatin) for several minutes.
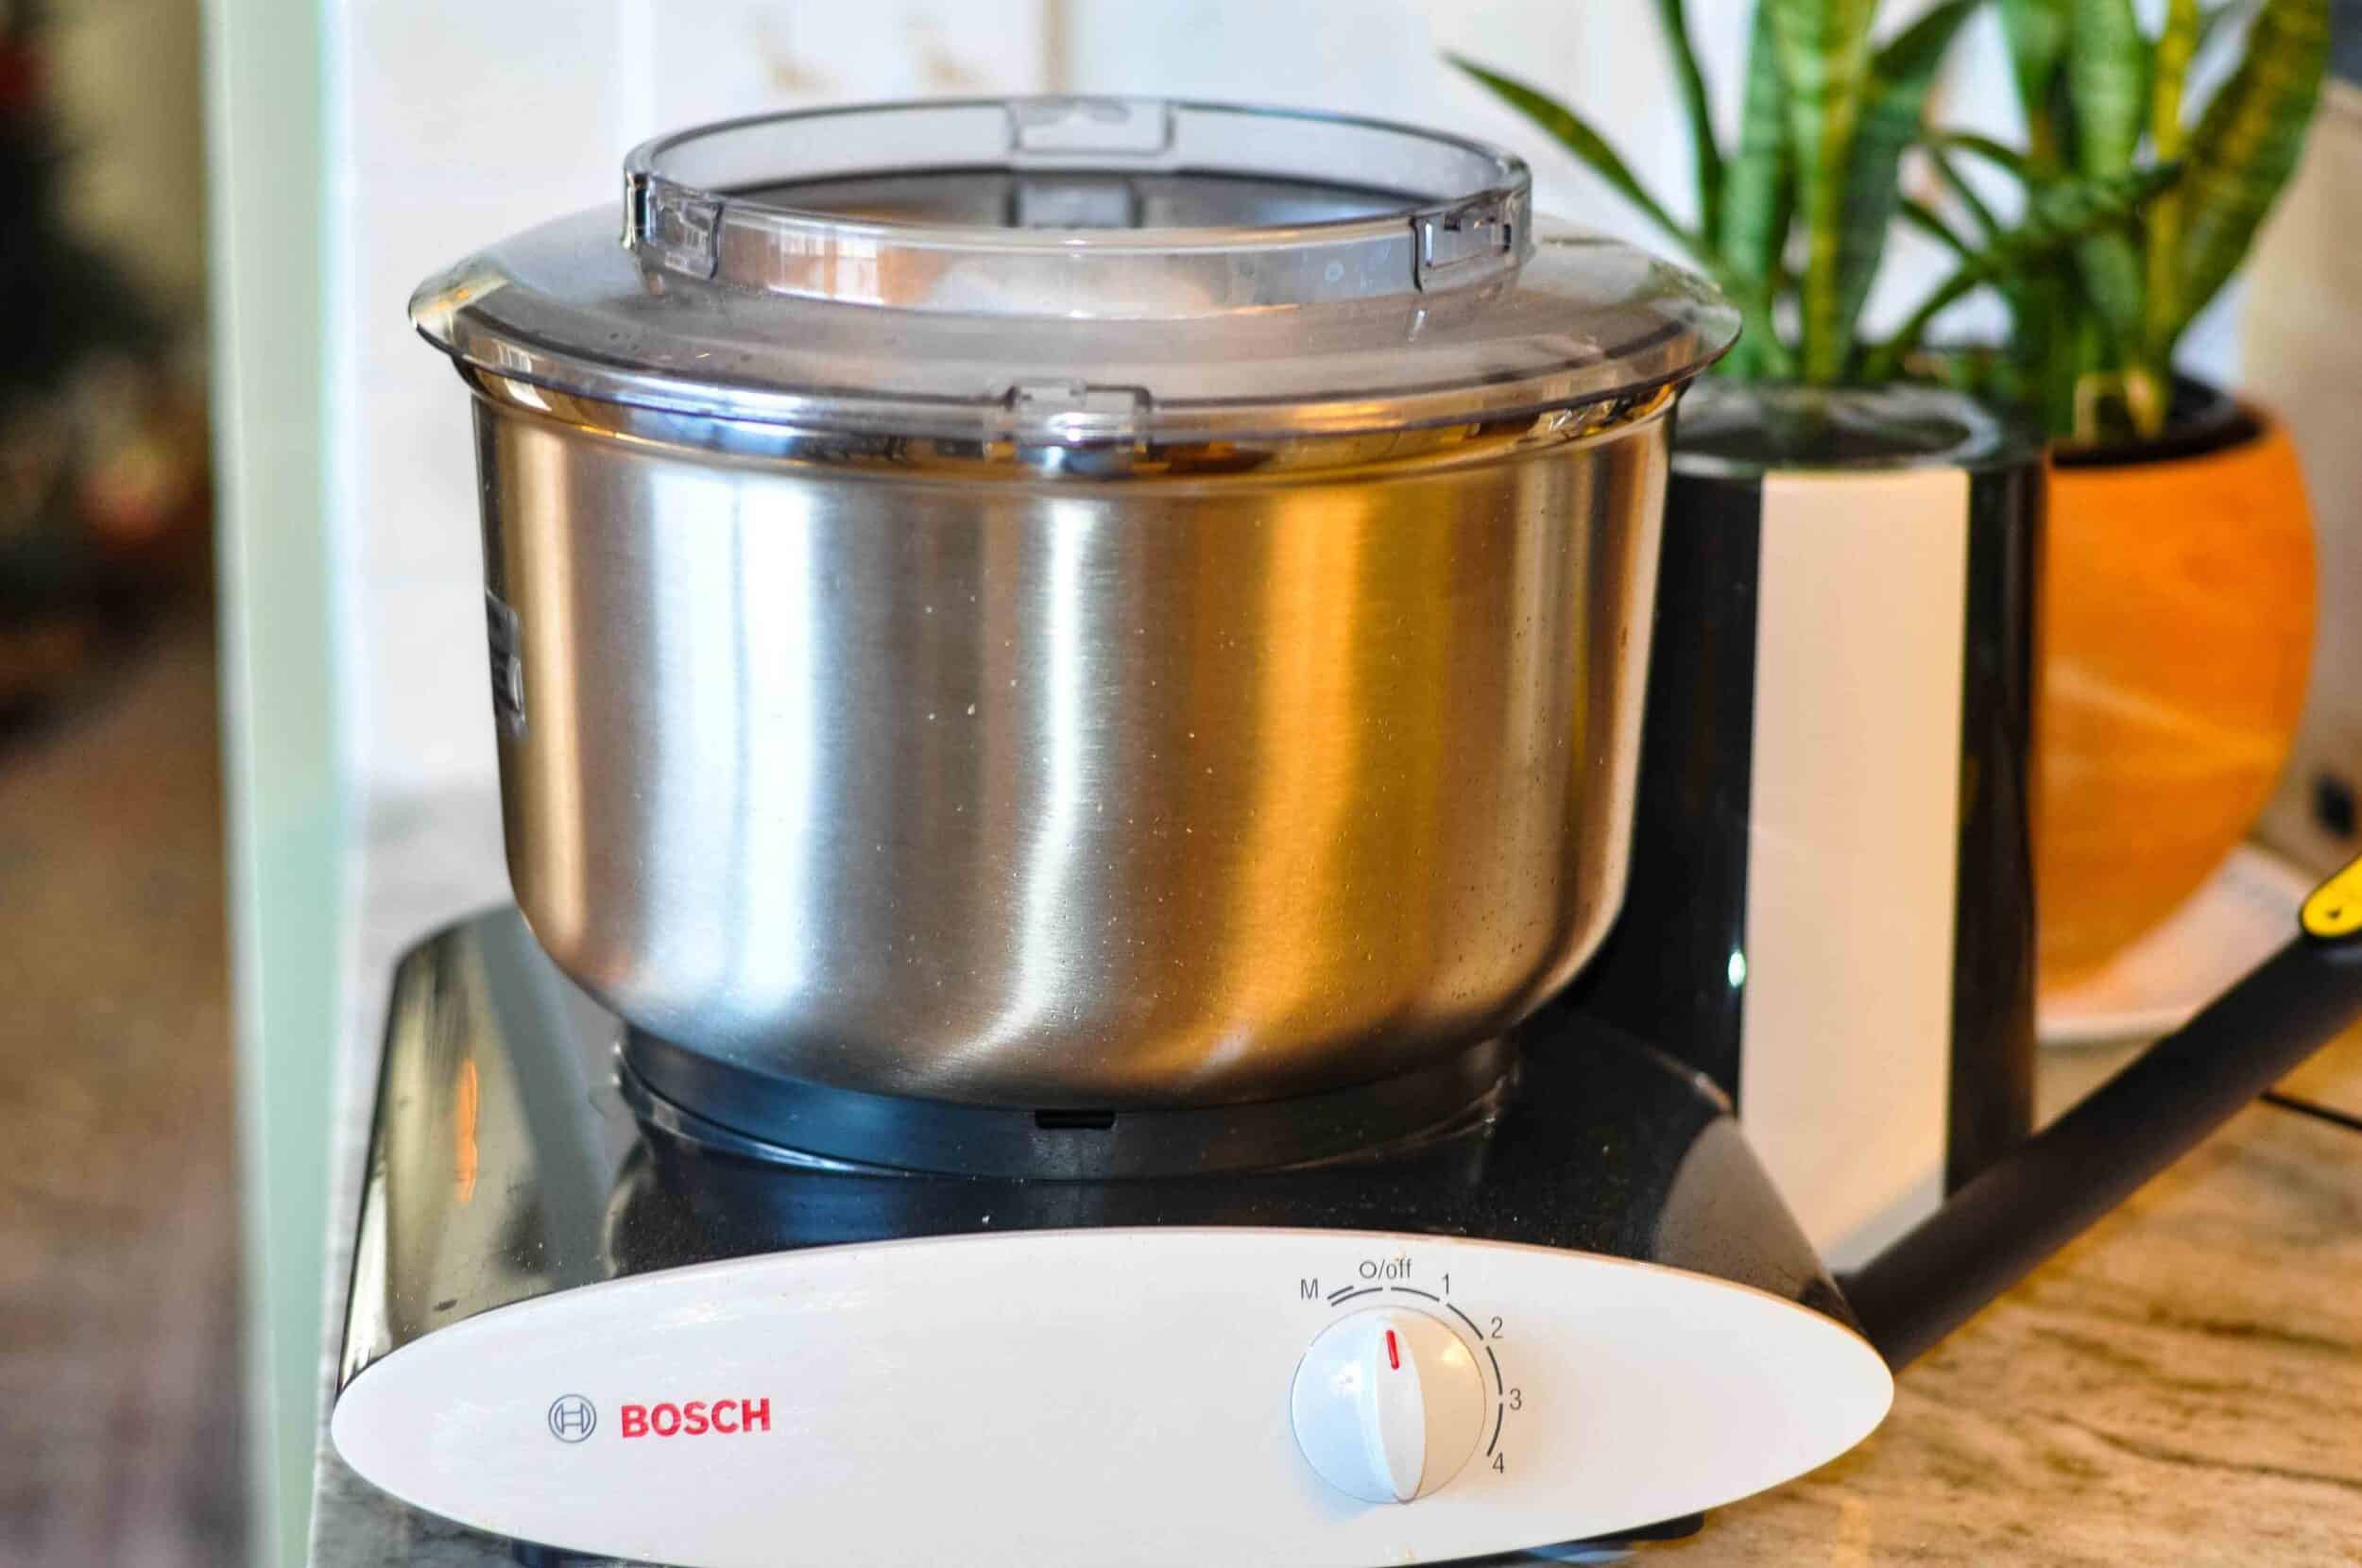
P.S. – If you are interested in the Bosch mixer (my favorite mixer ever) you can use my code HCH to save!
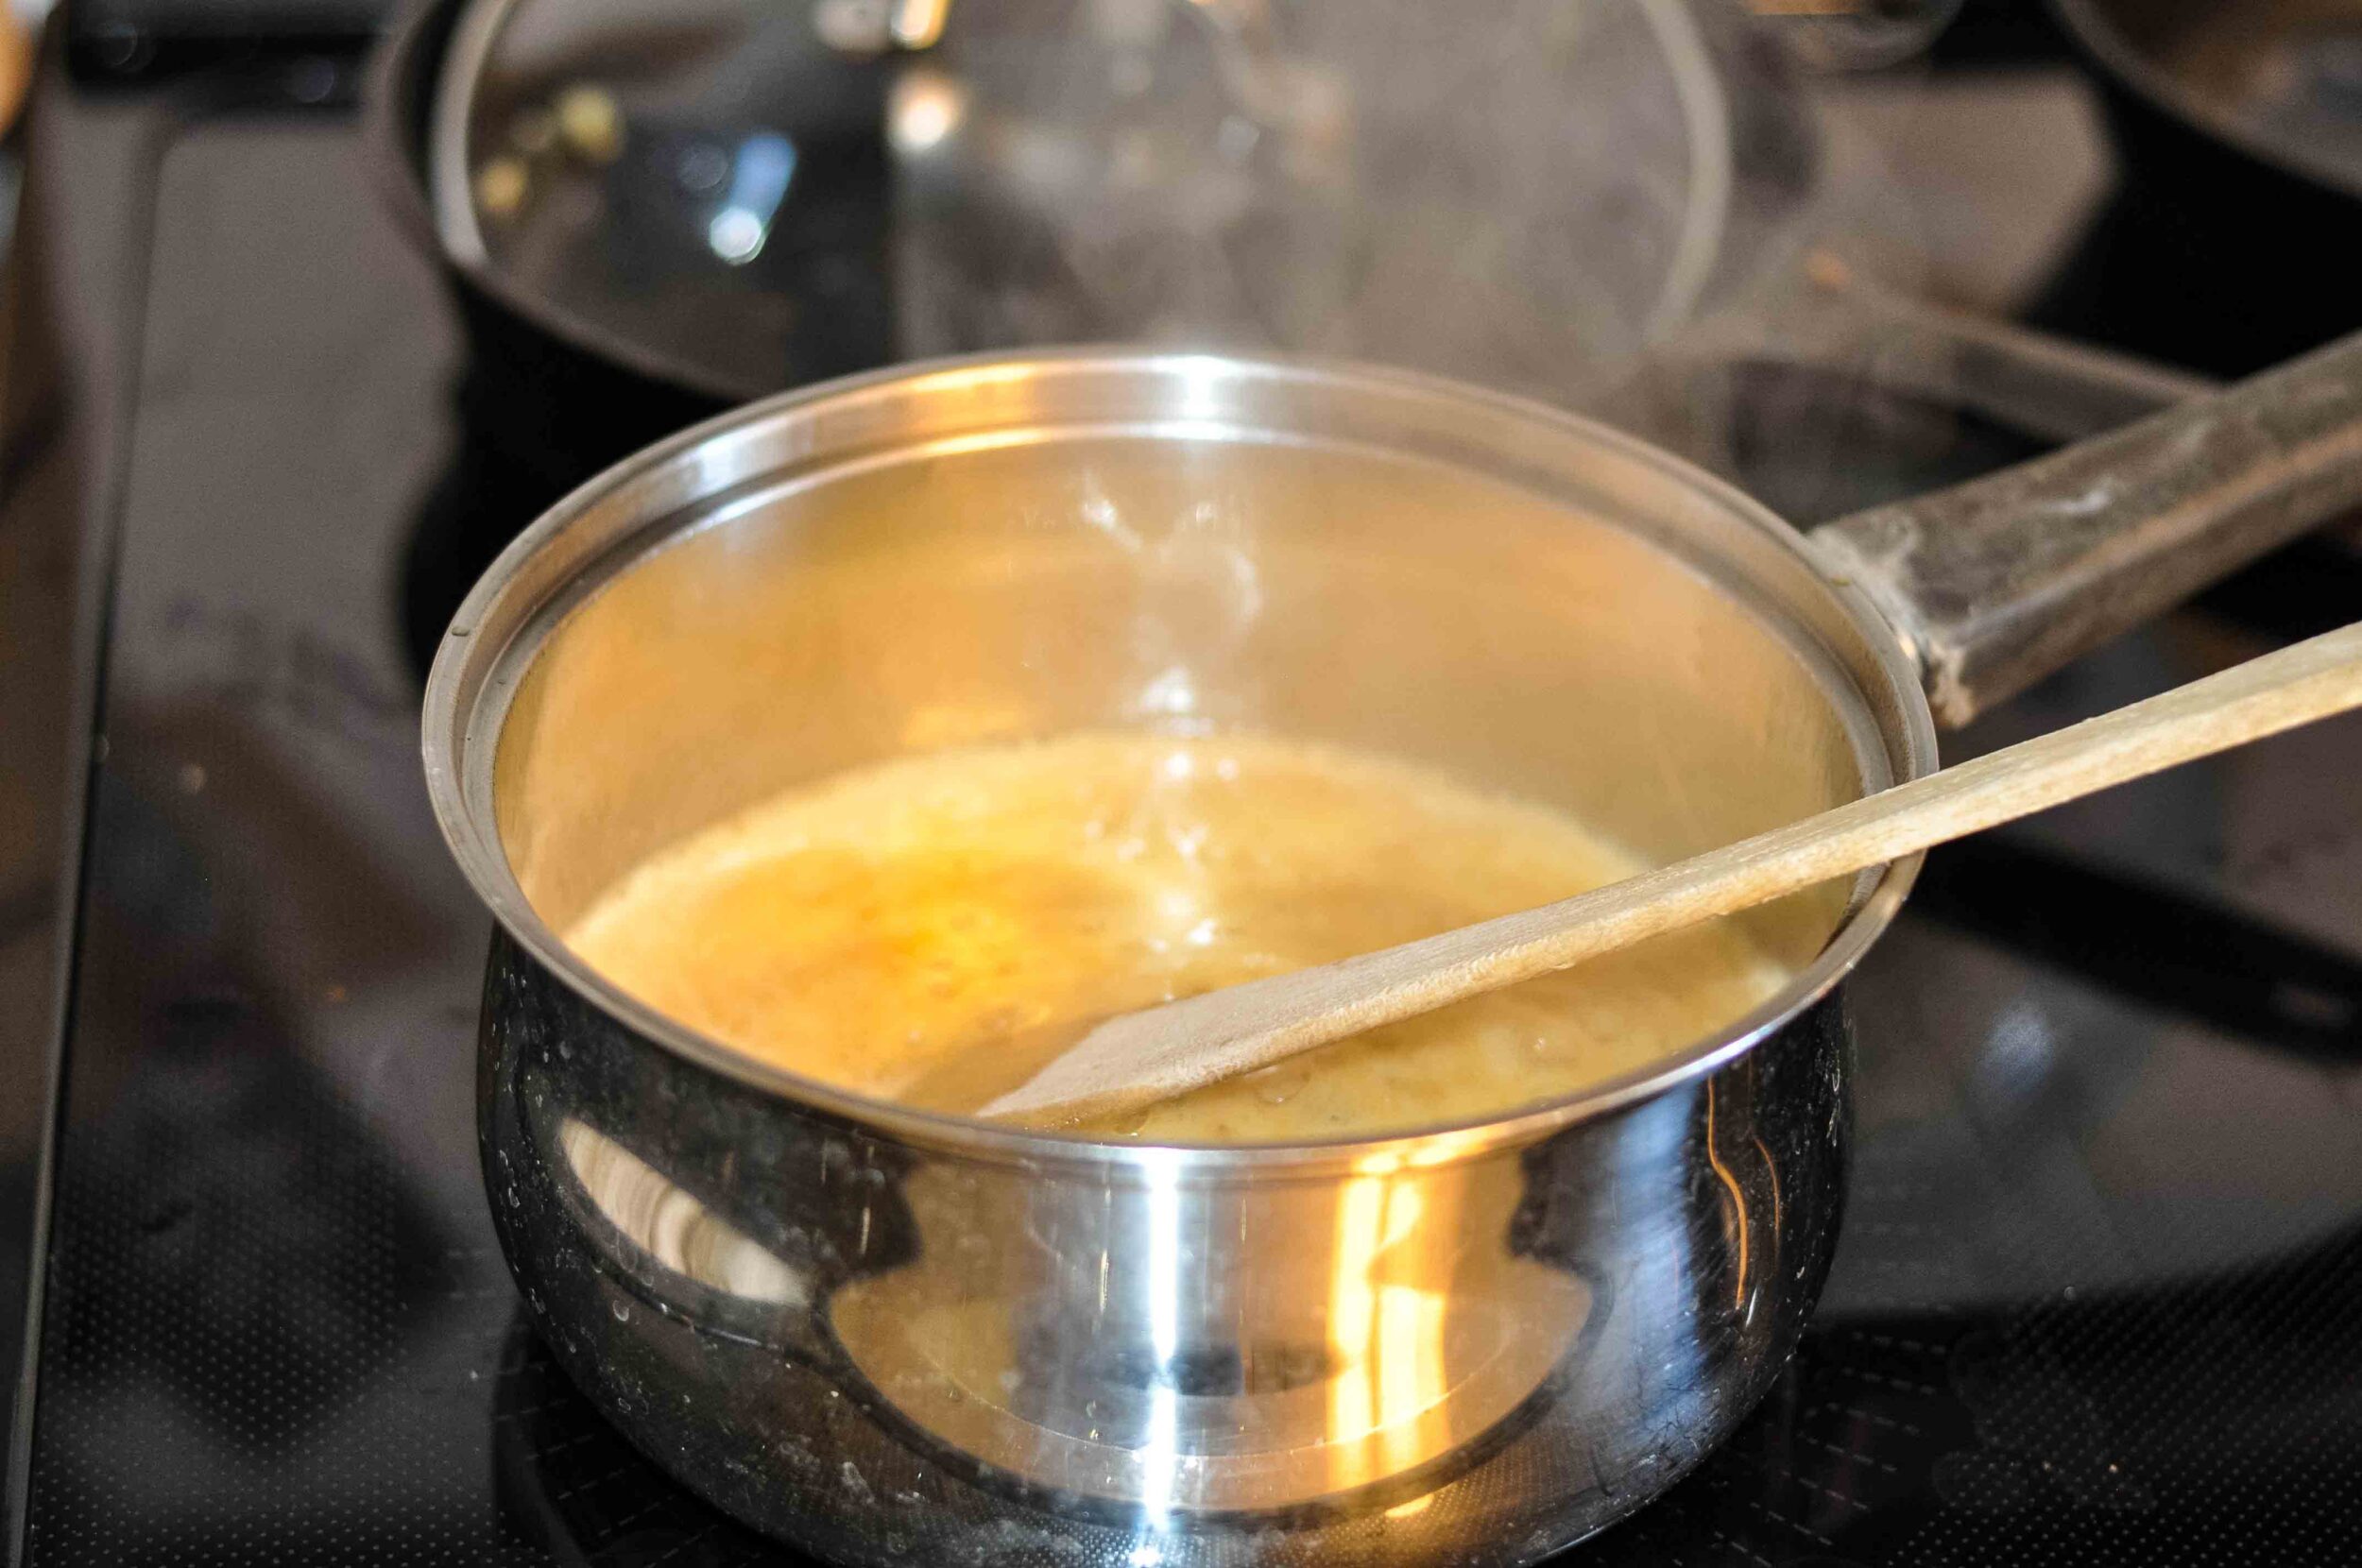
While the gelatin is blooming, heat the maple syrup in a saucepan over medium high heat. Bring the maple syrup to a rolling boil for at least a minute and stir.
Some recipes call for a candy thermometer and heating the syrup to 240° F (firm ball stage) for optimal results. However, I’m lazy and often can’t find my candy thermometer so I do without. As long as you get the maple syrup to a rolling boil for at around a minute, the recipe should set just fine.
After boiling the maple syrup, turn your stand mixer on medium-high speed and slowly drizzle in the hot syrup. Whisk for 5-10 minutes, keeping an eye on the mixture the whole time. While it’s mixing, prep an 8×8″ or 9×13″ pan with parchment paper.
As soon as the mixture starts to change color from brown to a light beige color (almost white) and the texture begins to get more stiff, it is ready. The texture will be soft peaks that stick easily to the spoon or whisk. The volume of the mixture will also triple in size.
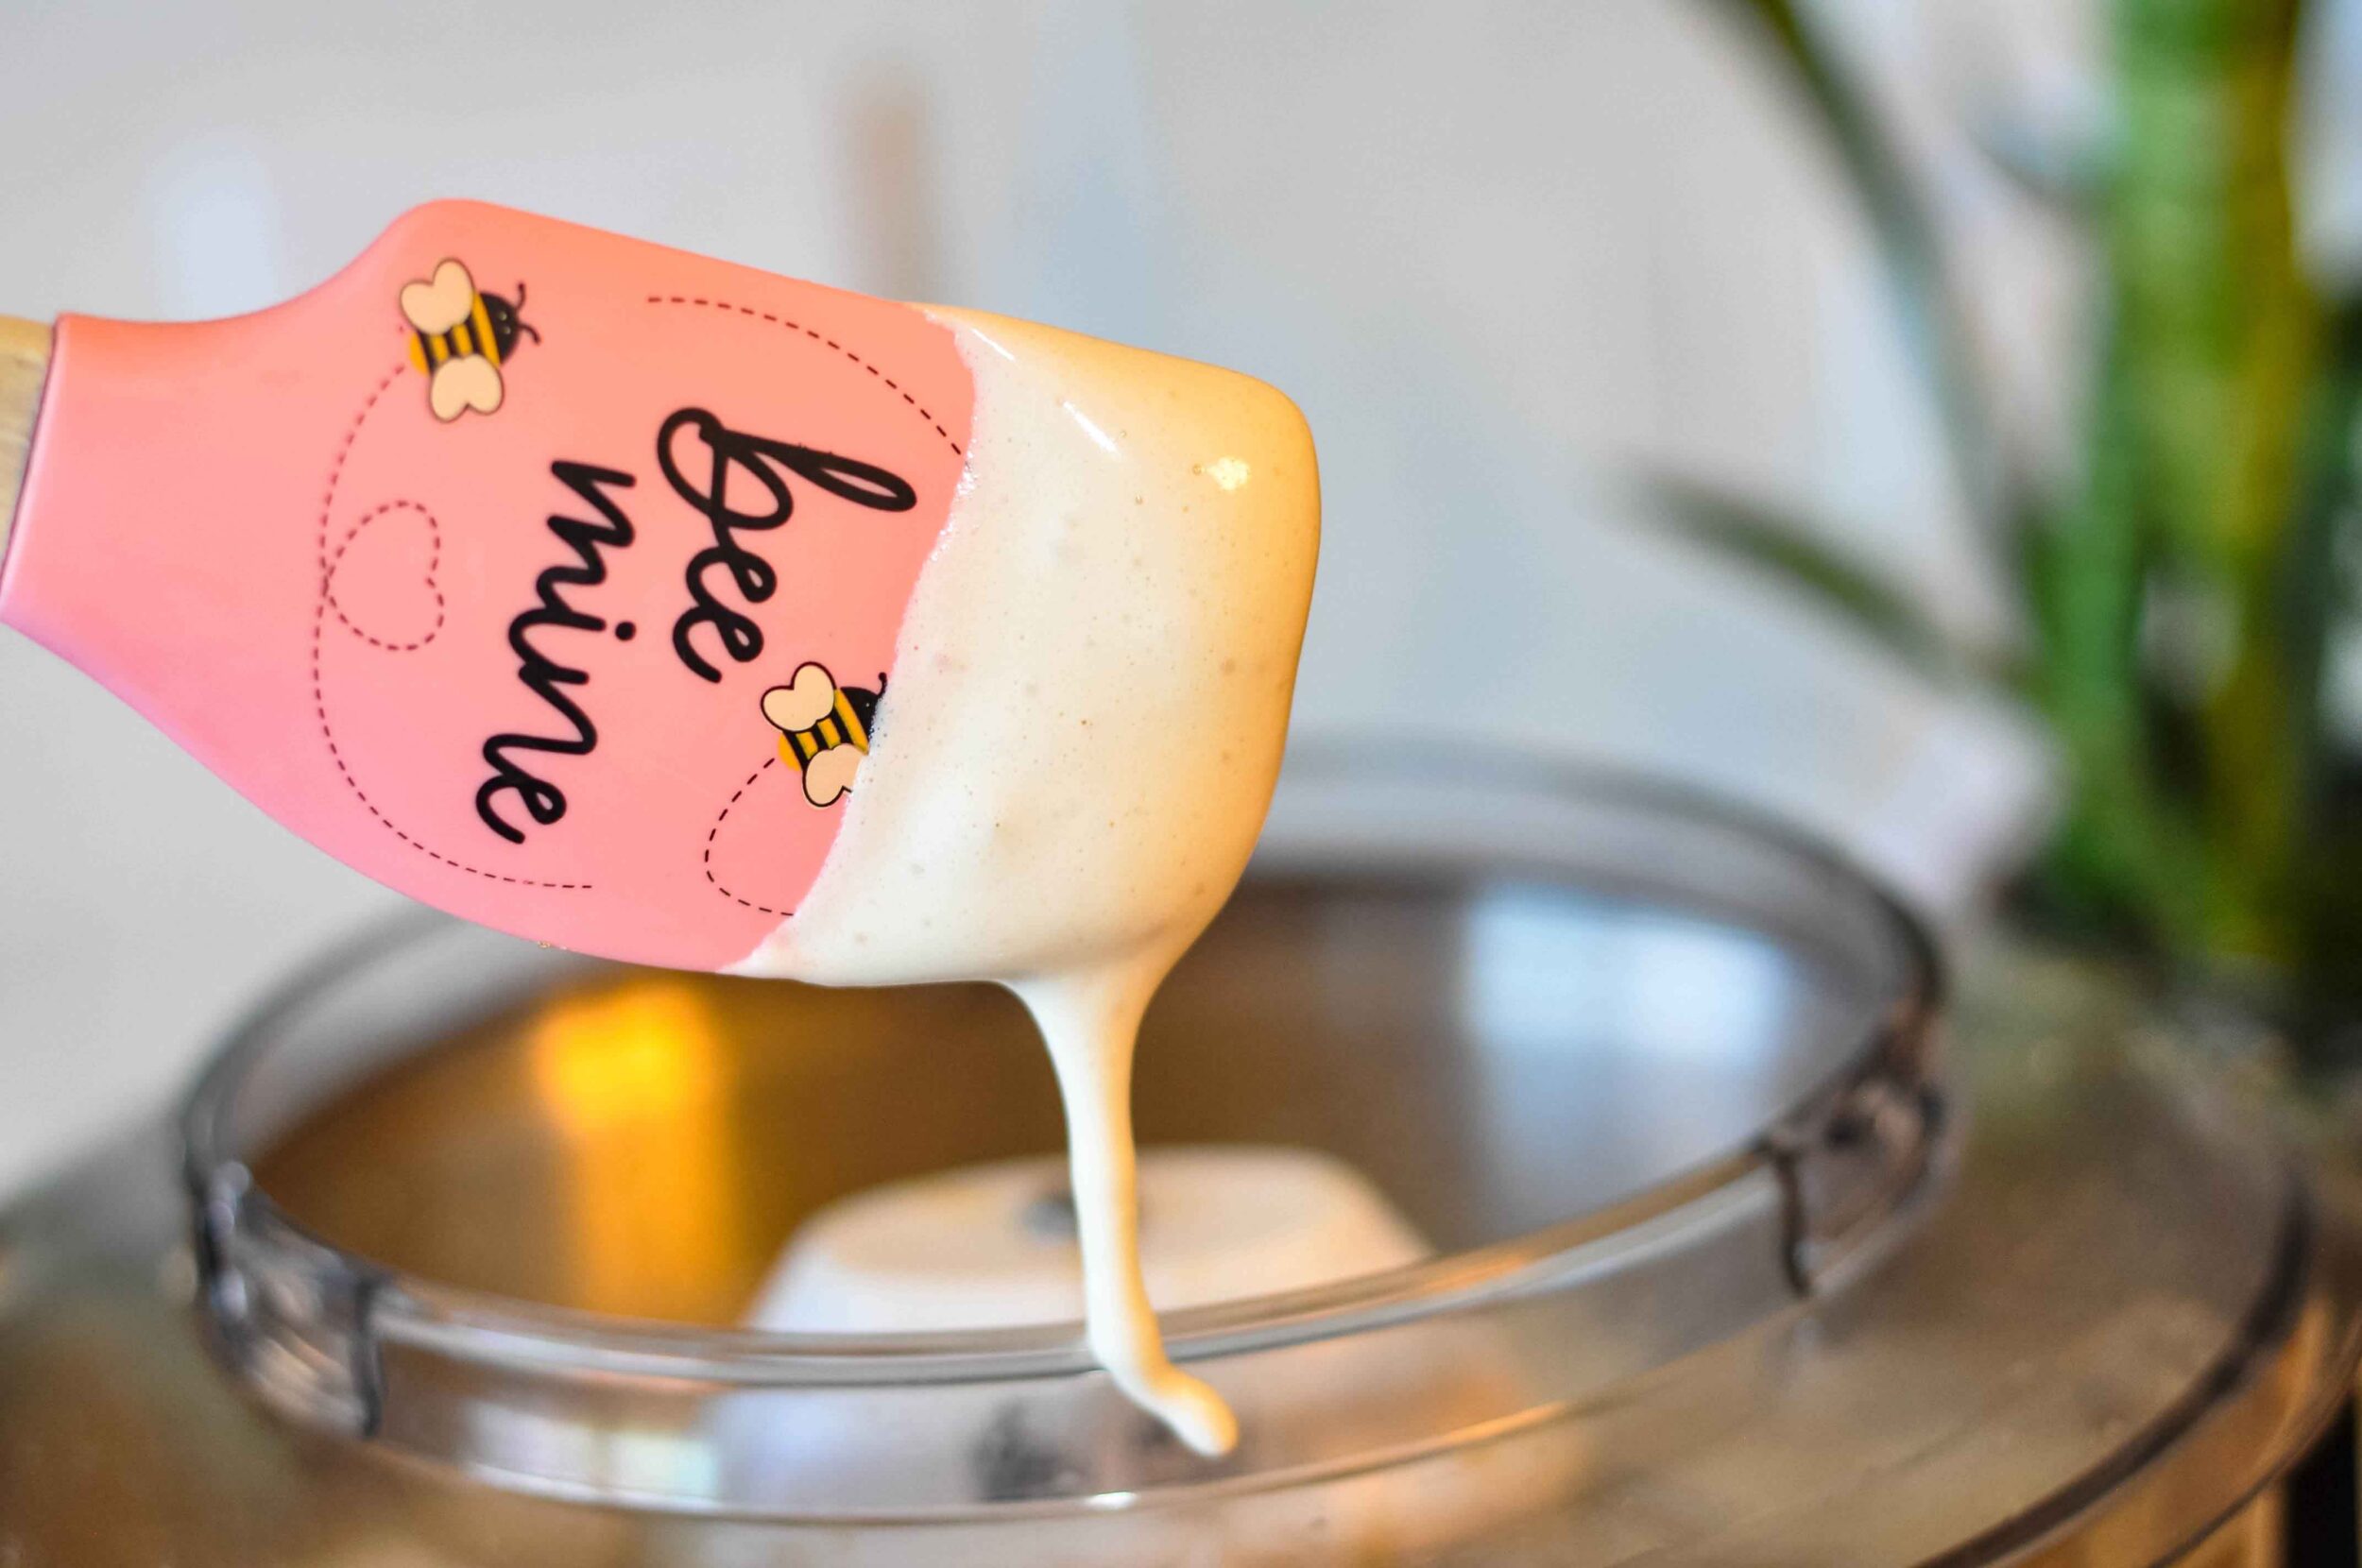
Here’s the important and tricky step in marshmallow making. You have to transfer the mixture from the mixing bowl to your prepared pan quickly! Otherwise, it will begin to set in the bowl before you get it into the desired shape.
You can see in the photo below, where I did not get the mixture into the pan quickly enough and it started to harden and get all globby in the top corner. It still tasted great though! 🙂

Smooth the marshmallow mixture in the pan with a spatula and leave it to “set” at room temperature for 6-8 hours. This curing step is very important and will help your marshmallows firm up and have that perfect spongy, squishy texture. It’s worth the wait!
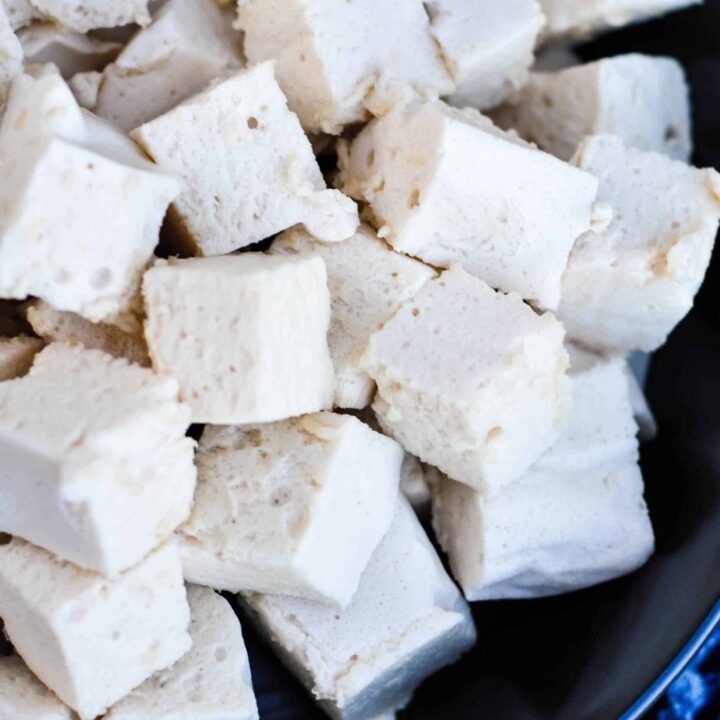
After your marshmallows have set, cut them into squares or shapes and enjoy!
Homemade Marshmallow Tips
Here are a few tips and tricks to ensure you have the best marshmallow experience!
- This is optional, but you can grease the pan and any utensils you use with butter or coconut oil. This will make it easier to cut and remove the marshmallows for best results and no sticking.
- 8×8 pan is better for taller, thicker marshmallow squares, while 9×13 makes more shallow marshmallows (good for cutting into shapes).
- Store at room temperature or in the fridge, but do NOT freeze. The marshmallows will lose their texture and become very sticky when thawed.
- Homemade marshmallows melt pretty fast, so if you want that spongy “bite” in your cocoa, act quickly! 🙂
Marshmallow Flavor Variations
There are several fun flavors you can add to this basic vanilla maple recipe to make them even more fun! Here are some ideas:
- Peppermint marshmallows: Add 1-2 teaspoons peppermint extract to the marshmallows while mixing.
- Chocolate marshmallows: Add 1/2 cup cacao powder to the marshmallows while mixing for a decadent flavor.

- Cinnamon marshmallows: Add 2 teaspoons of cinnamon to the marshmallow mix for a festive spiced treat.
- Tea infused marshmallows: Use another flavor of tea to bloom the gelatin instead of marshmallow root. The possibilites are endless here! Black, earl grey, chai, chamomile, hibiscus, ginger… you get the idea.
How to Store Homemade Marshmallows
There are a couple of options for how to store marshmallows. Some insist they be kept at room temperature, and others refrigerated. Either works, but personally I like to keep mine in the fridge as I feel they will last longer.
It’s best to store them in an airtight container, and DO NOT freeze the marshmallows as they will lose their fluffy texture and become super sticky when thawed.
Ideas for Using Homemade Marshmallows
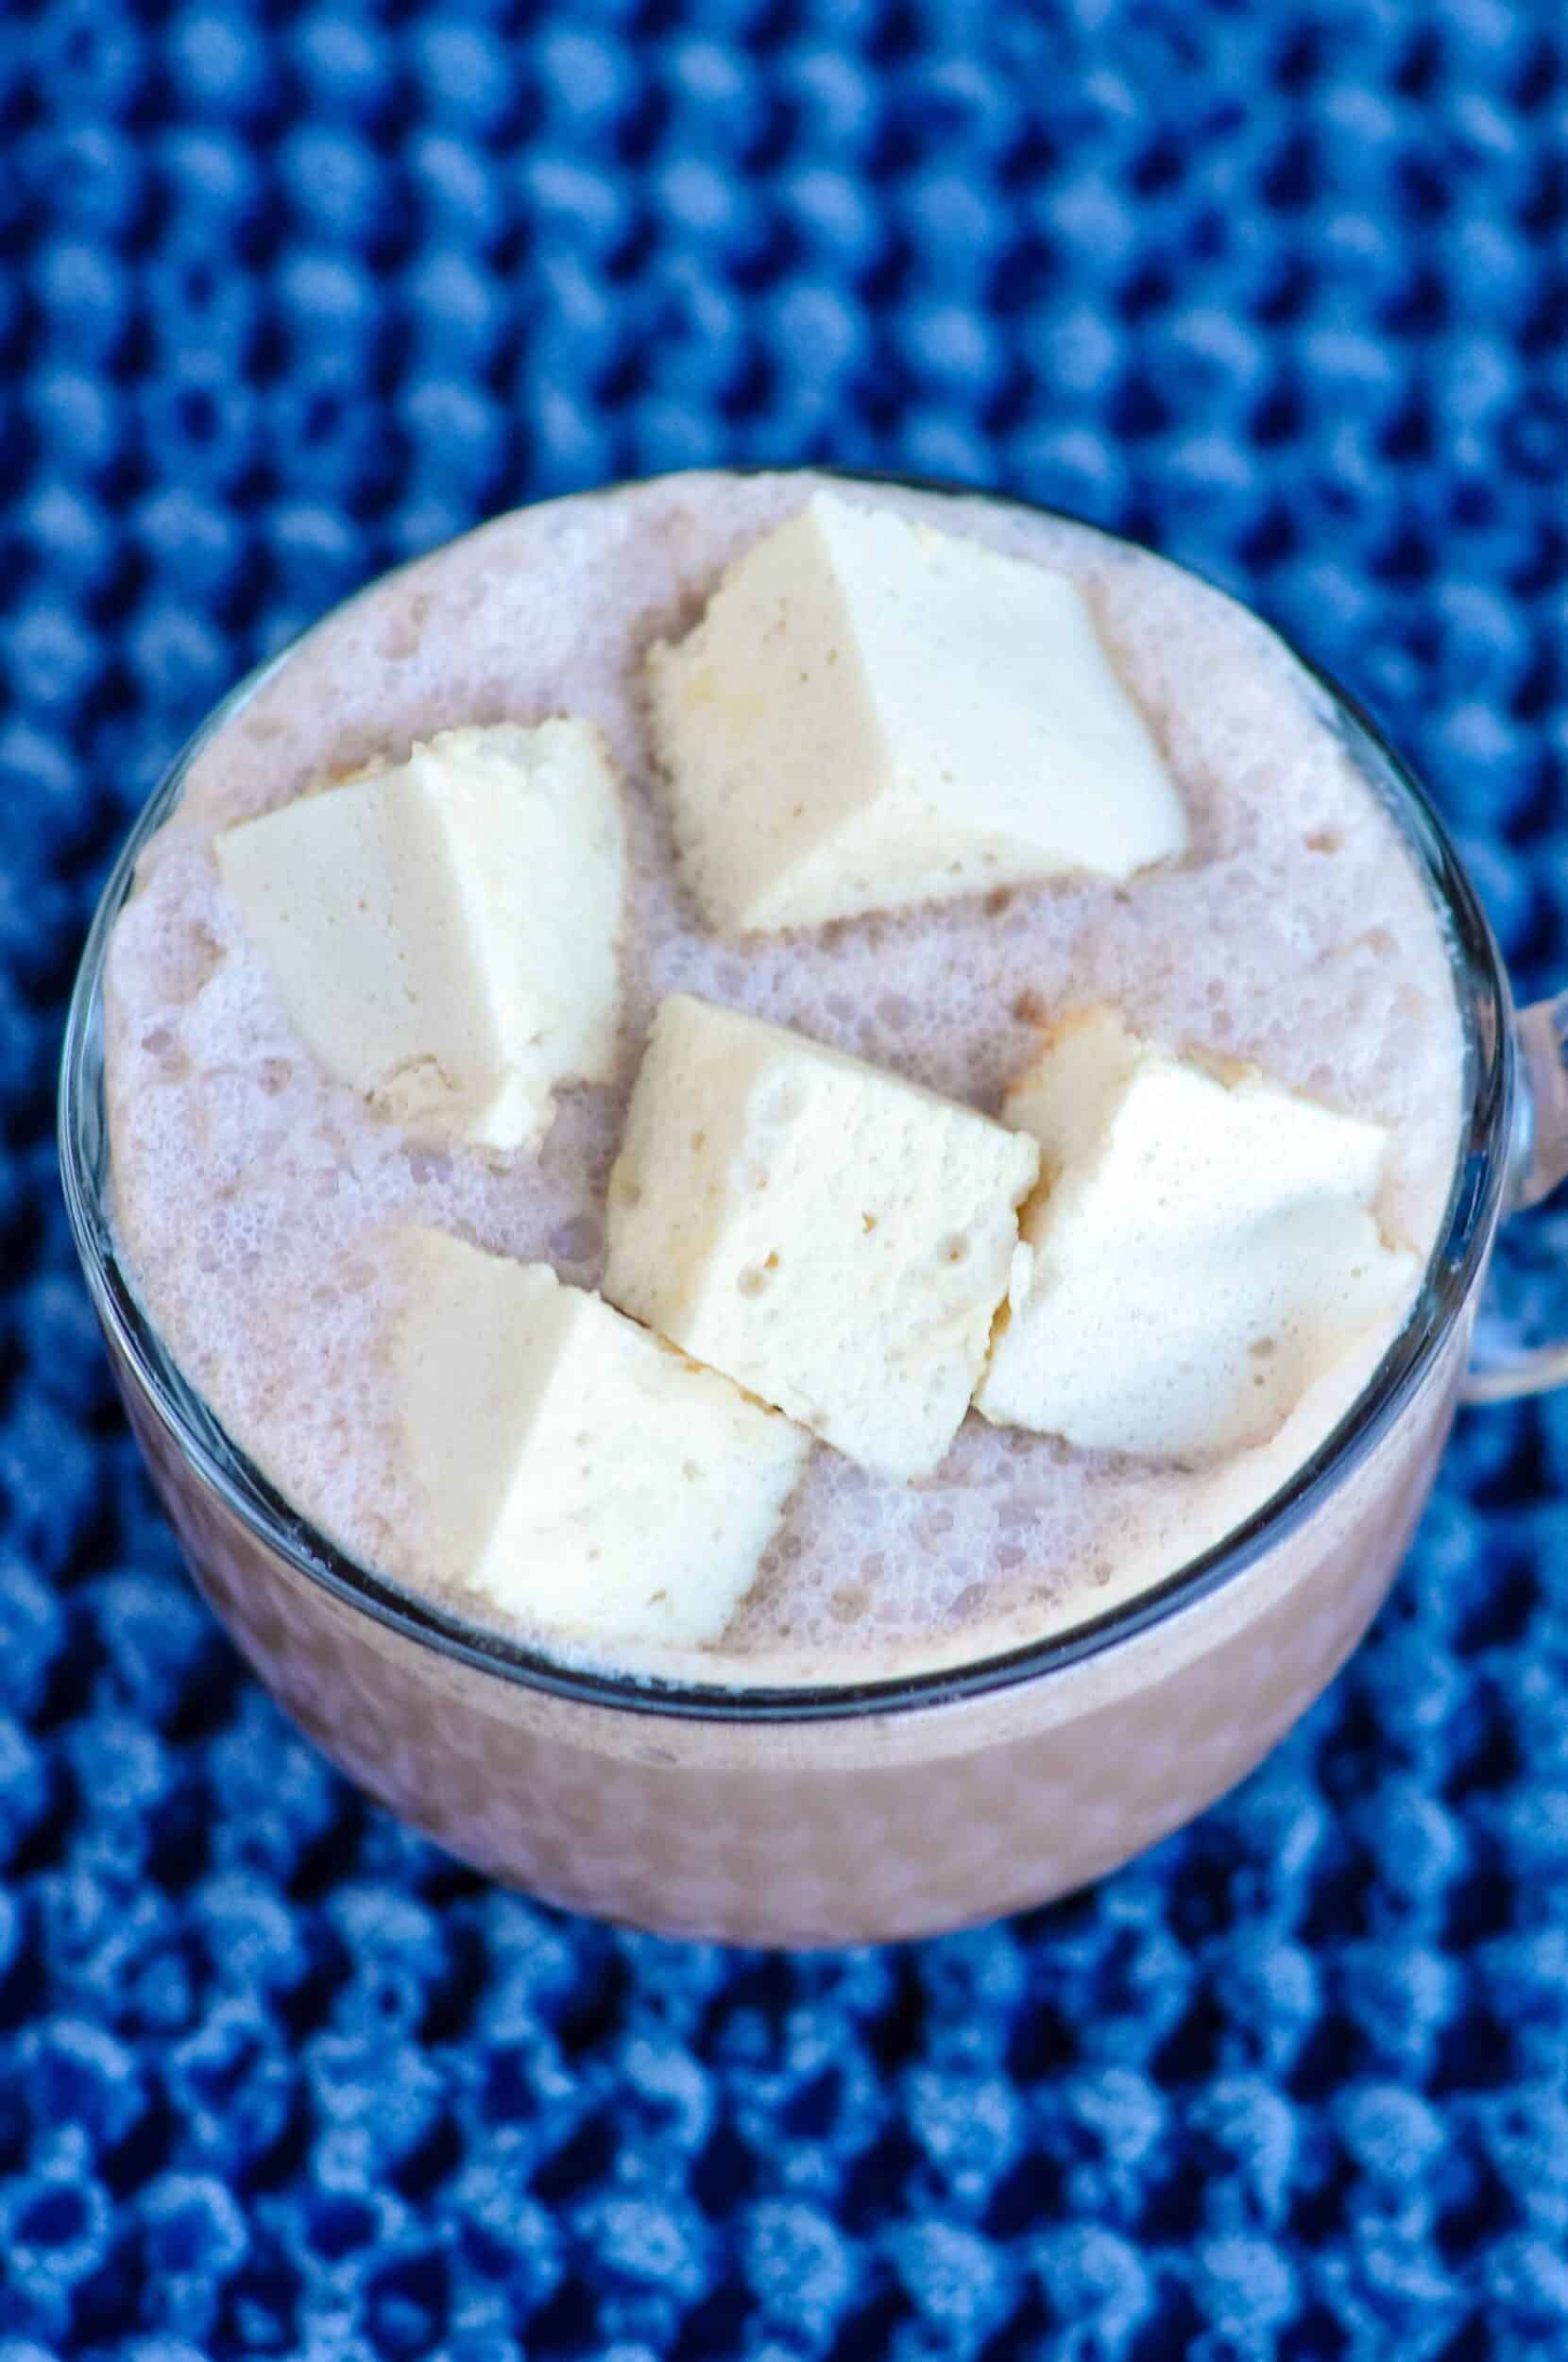
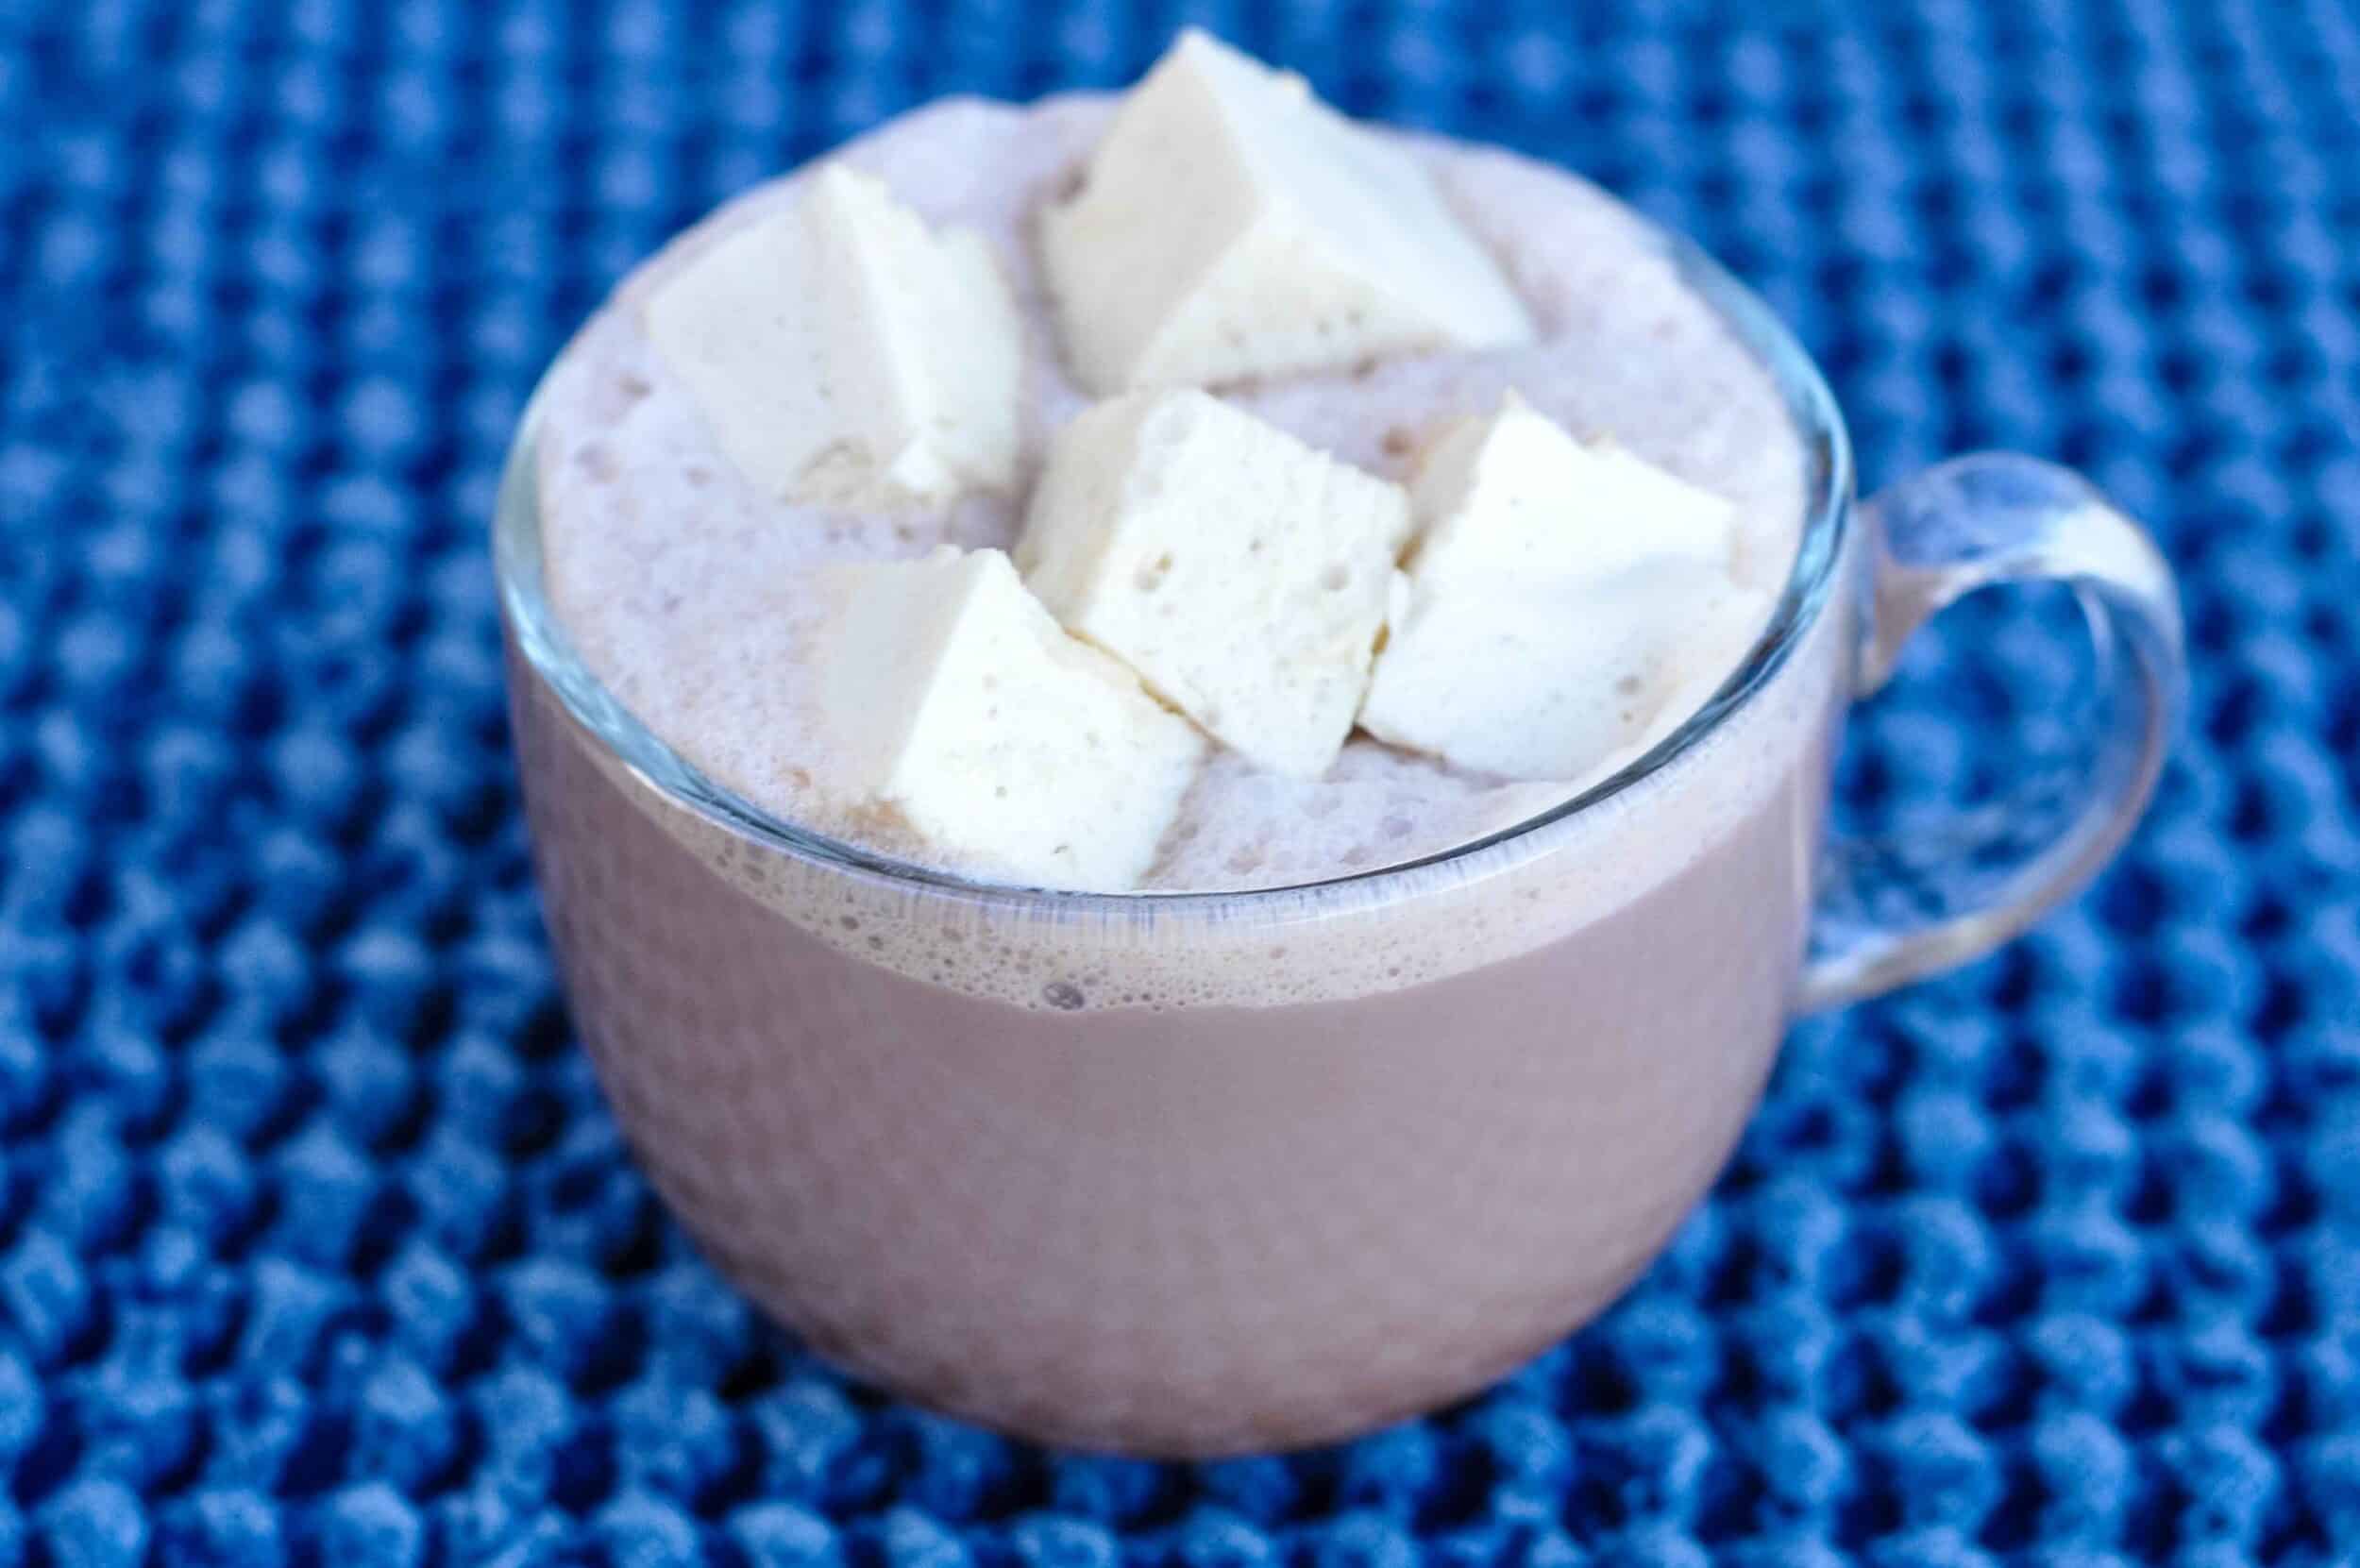
The best and most obvious use for these marshmallows is for topping hot cocoa! They’re sooo good but the do melt quickly, so if you like the spongy “bite” of marshmallow while you are drinking cocoa, act fast!
These would also be wonderful in coffees and lattes, especially holiday flavored ones.
I also absolutely love these for snacking or a simple dessert. Just a couple marshmallows satisfies my sweet tooth, and I know I’m eating something nourishing that’s not laden with sugar.
You can also roast homemade marshmallows! I think they melt faster than store-bought ones, so it’s best to cut them and let them sit out and develop a “skin” first so they hold up better under a flame.
Maple Marshmallows with Real Marshmallow Root
These homemade maple marshmallows are quick and easy to whip up, perfect for hot cocoa! They even feature real marshmallow root tea as the base, which has a unique flavor and makes them extra good for you!
Ingredients
- 3 Tablespoons marshmallow root
- 1 cup filtered water
- 1 teaspoon vanilla extract
- 3 Tablespoons grass fed gelatin
- 1 cup maple syrup
Instructions
- Add the marshmallow root to a jar or teapot and pour in just over a cup of boiing water. Steep and allow to cool before proceeding with the recipe.
- Line an 8x8" or 9x13" pan with parchment paper and set aside.
- Measure one cup of cooled tea and add to a stand mixer fitted with the whisk attachment along with gelatin and vanilla extract.
- Mix these ingredients together for a few seconds and then allow gelatin to bloom.
- Meanwhile, boil the maple syrup in a small saucepan until it comes to a rolling boil for at least one minute. Alternatively, for even better results, use a candy thermometer and boil until the syrup reaches 240° F.
- Drizzle immediately into the stand mixer on medium high speed. Continue to beat the mixture until it becomes creamy white, fluffy, and forms soft peaks. It should cling to the spoon or beater. This will usually take between 5-10 minutes.
- Once the marshmallow mixture reaches this point, pour immediately into the prepared pan. Work quickly before mixture starts to harden.
- Allow marshmallows to set at room temperature covered for 4-8 hours until cured. They will have a somewhat firm, yet spongy texture.
- Store in the fridge in an airtight container for up to 1 week.
Recommended Products
As an Amazon Associate and member of other affiliate programs, I earn from qualifying purchases.

Nutrition Information:
Yield:
25Serving Size:
1Amount Per Serving: Calories: 38Total Fat: 0gSaturated Fat: 0gTrans Fat: 0gUnsaturated Fat: 0gCholesterol: 0mgSodium: 4mgCarbohydrates: 9gFiber: 0gSugar: 8gProtein: 1g
can you substitute 1 cup of sugar for the 1 cup of syrup?
I haven’t tried it, but the liquid component of syrup is important. It would probably work if you dissolved the sugar in water and made like a sugar syrup.
Thanks for posting this information! Sounds like a real treat!
I have seen others mention dusting w cornstarch to keep from sticking together.
You’re welcome! Yes, you can definitely do this!
Looks great! Could I use honey?
Absolutely! Honey works great.